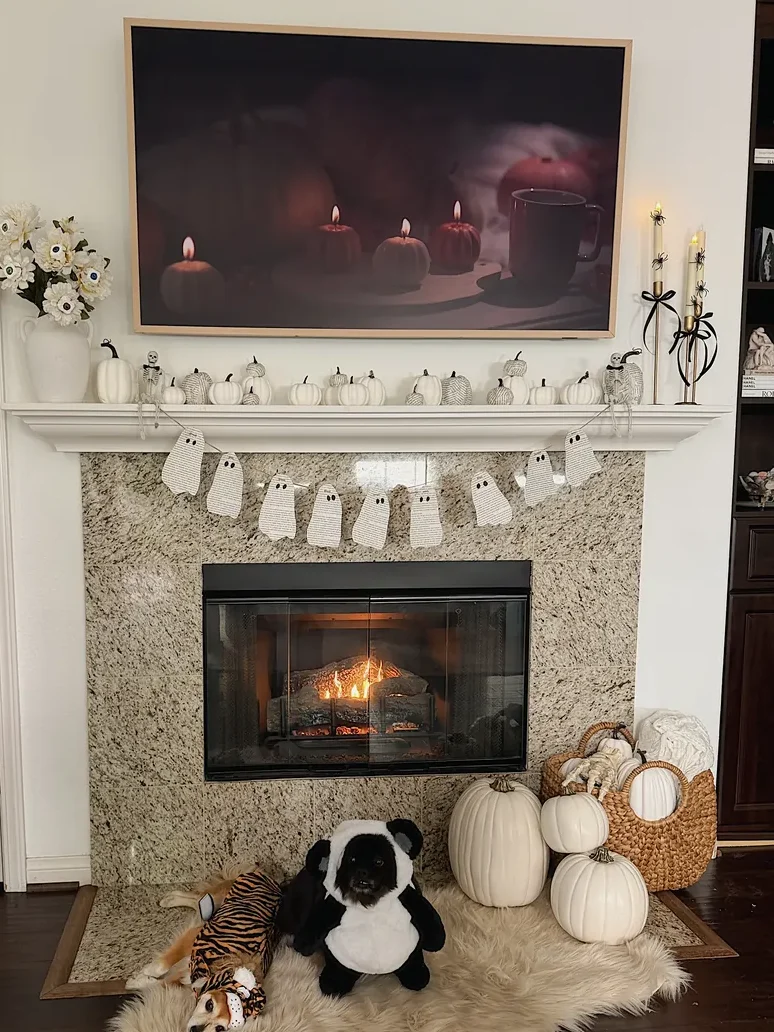
Halloween has always been my favorite holiday. I love dressing up just as much now as I did when I was a little girl. This year my son wants to repeat our DIY Paw Patrol costumes from last year, so I had to get my creative fix somewhere else. I’m on a major budget right now, so I put on my witch hat and got crafting. The result: ten easy Halloween DIY decorations, all black and white, almost all under $5.
Last year I went all white. This year I wanted black and white, a little spookier, still something I could live with for a month. Almost everything here cost under $5, most of it came from things I already had, and all of it comes down in an afternoon so the house goes back to normal on November 1.
The 10 easy Halloween DIY decorations
- Plastic tablecloth ghosts for the front yard
- Paper towel roll bats
- Egg carton eyeballs, three ways
- Painted black flowers in your everyday arrangements
- Spider and ribbon candlesticks
- Book page pumpkins
- Book page ghost garland
- Framed book page ghosts
- Skeleton with a bow tie
- Tissue paper ghosts for the chandelier
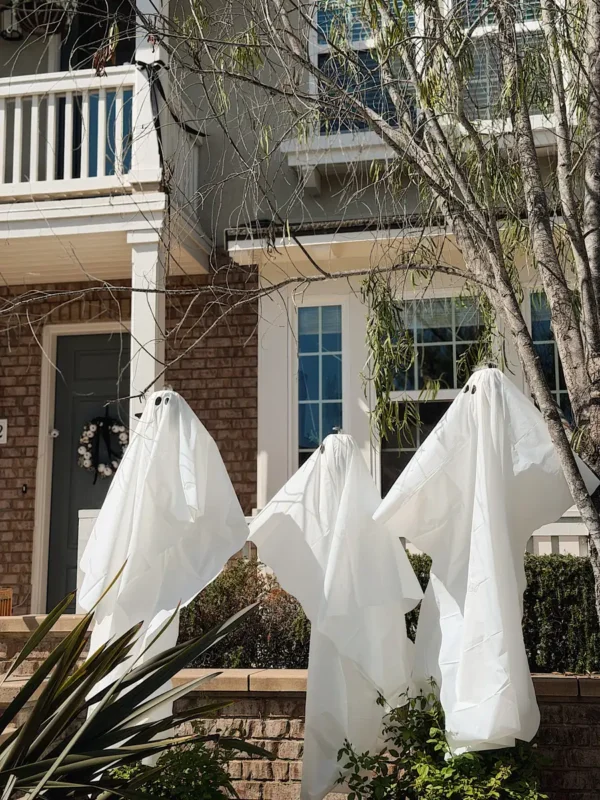
1. Plastic tablecloth ghosts for the front yard
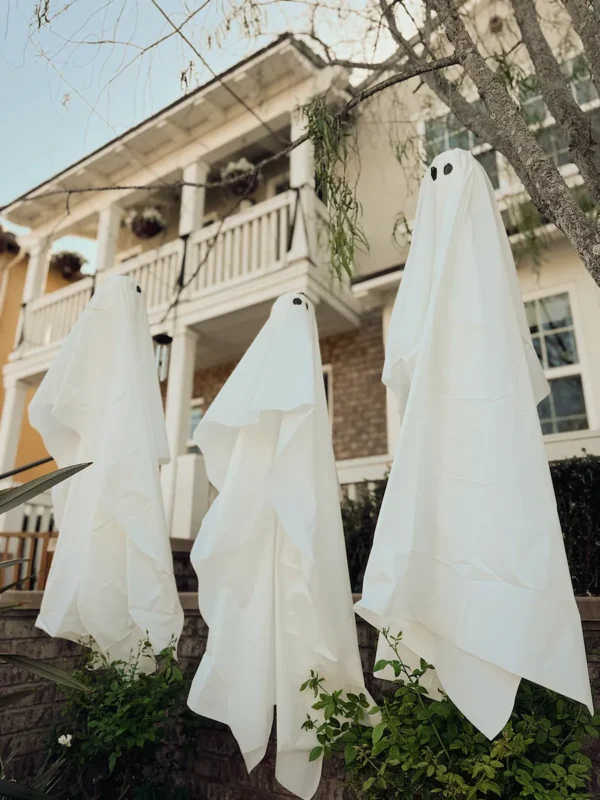
These are the ghosts hanging from the tree out front, and they’re the cheapest thing in the house. I took three foam pumpkins I had from a year prior, bought $1 plastic table covers from Target, cut a tiny hole in the center of each, draped them over the pumpkins, and hung them with fishing wire. Eyes are black Sharpie. That’s it.
The part I didn’t expect to love: they’re waterproof. Which, if you’ve ever hung anything fabric outside in October, you know matters.
You need: foam or craft pumpkins (Amazon), white plastic table covers, fishing line (Amazon), black Sharpie (Amazon)
Steps: cut a small hole in the center of the tablecloth, drape over the pumpkin, tie fishing line through the pumpkin stem or around the top, draw two eyes, hang.
Tip: cover the hole with a few pieces of packing tape before you hang them so it doesn’t rip.
2. Paper towel roll bats
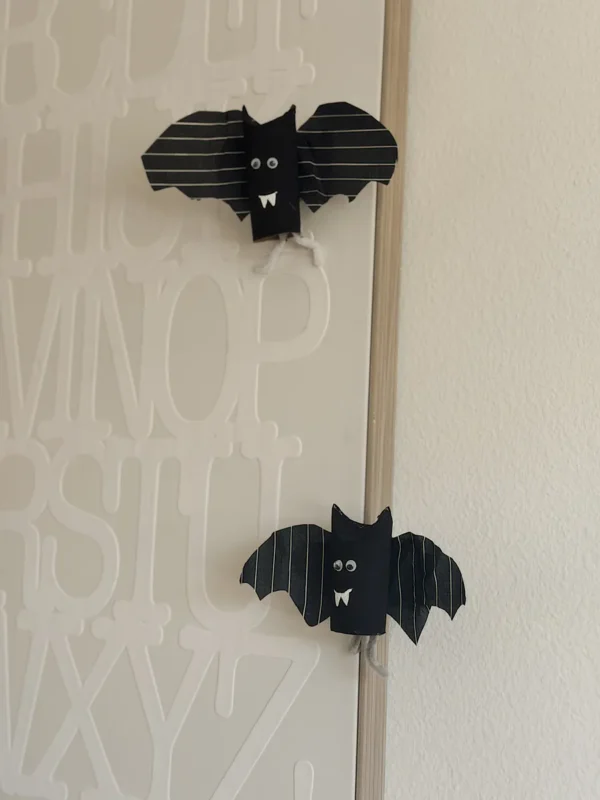
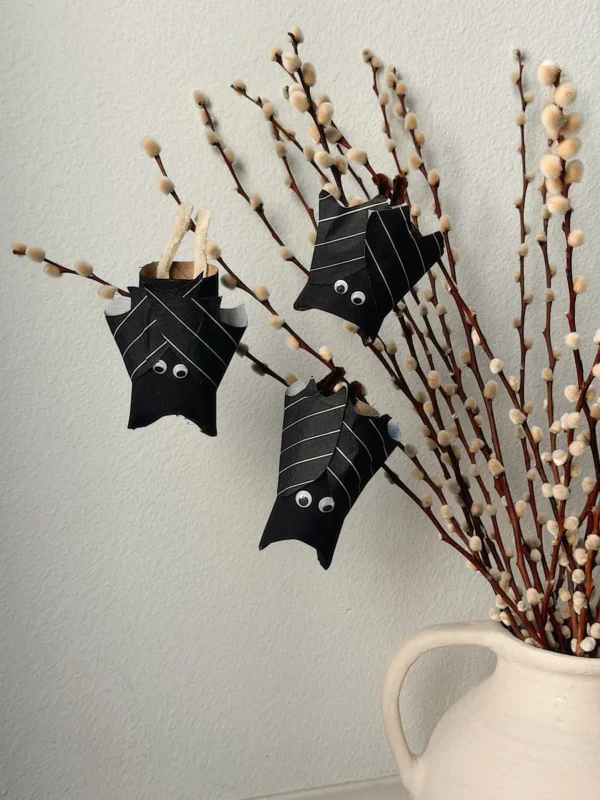
I saved paper towel rolls for these instead of toilet paper rolls, because you can cut them into different-sized bats. Fold the top edges to make ears, paint them black, add googly eyes, and attach wings.
I used black napkins I’d bought for a Halloween party as the wings, and I wouldn’t recommend it. They were too flimsy. Construction paper works a lot better and that’s what I’ll do next year.
For feet, a pipe cleaner glued or duct-taped to the bottom. Then put them everywhere: clipped onto the pussy willow in the entry vase, hung on fishing wire over picture frames, tucked on the letter board.
You need: paper towel rolls (saved), black acrylic paint, googly eyes (Amazon), black construction paper (Amazon), pipe cleaners (Amazon), hot glue gun (Amazon) or duct tape
Steps: cut the roll to size, paint black, fold the top corners inward for ears, glue on eyes and paper wings, add a pipe cleaner at the base.
3. Egg carton eyeballs, three ways
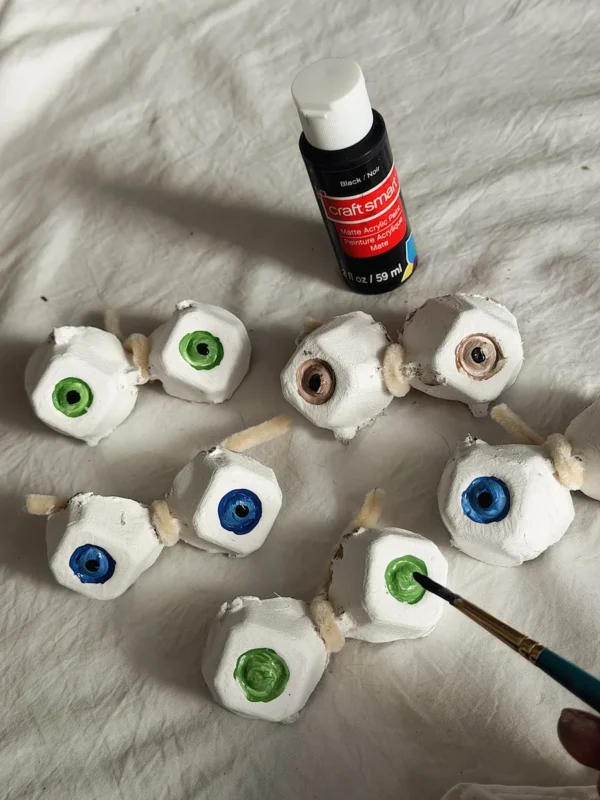
This is the project everyone asks about. Cut an egg carton into sets of two cups and/or individual cups, paint them white, and paint an iris in whatever colors you like with a black pupil. I added a white dot for the glare because I’m an artist and type A and way too much of a perfectionist. You don’t have to go that far. Googly eyes on the white cups work too.
Three places they went:
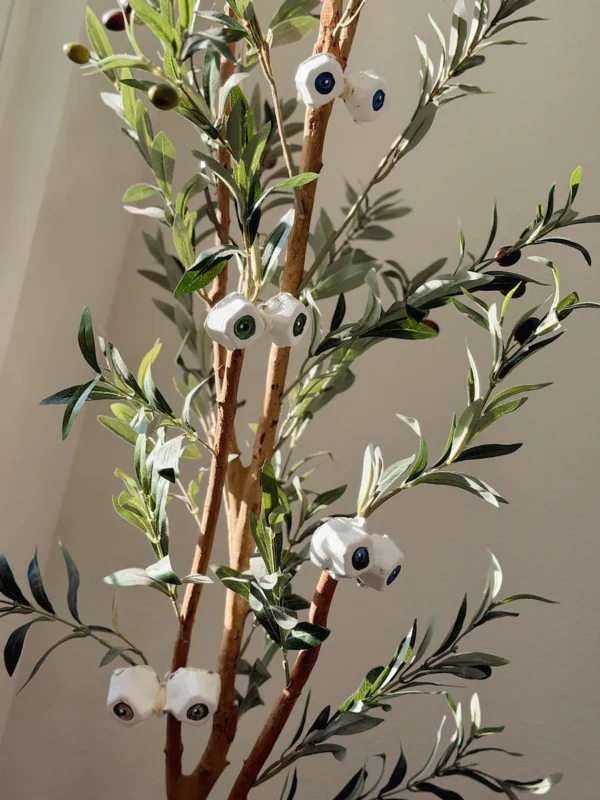
- In the olive tree. I kept these cups in pairs, tied a pipe cleaner around the middle, and twisted them onto the branches of the faux olive tree that stays up all year. Spooky but still chic.
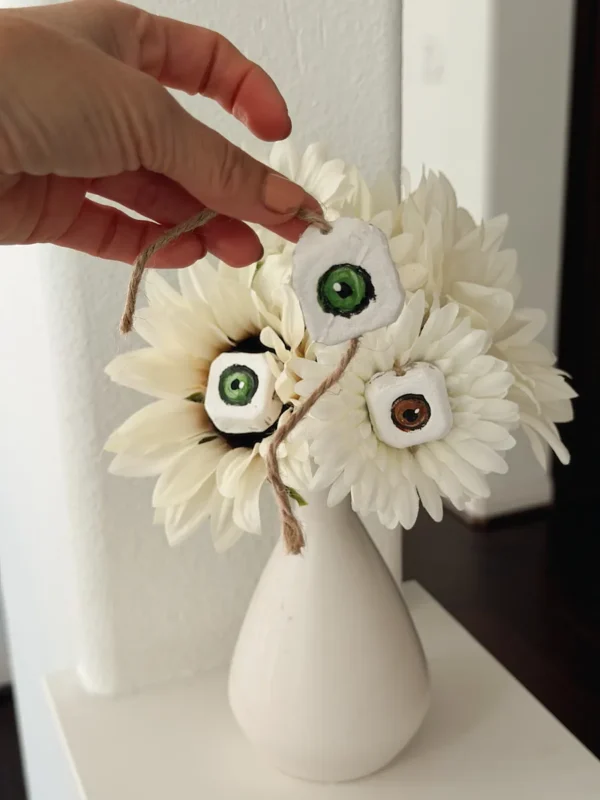
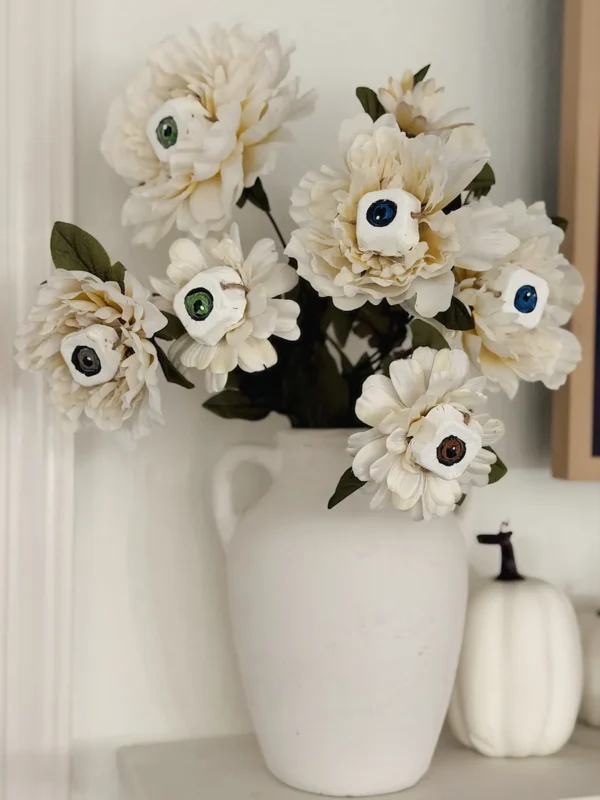
- In the flowers. Solo eyes get a loop of twine and tie onto the white faux sunflowers and peonies I keep out year-round.
- In the bud vase. A couple of pairs on twine in a small white vase for the side table.
The point is everything underneath is my normal decor. Take the eyes off in November and the tree and flowers go back to being a tree and flowers.
You need: egg cartons (saved), white acrylic paint, acrylic paint set for the irises, small paintbrush, twine, pipe cleaners (Amazon); optional googly eyes (Amazon). What they’re sitting on: my faux olive tree and white faux peonies and sunflowers.
Steps: cut cups apart, paint white and let dry, paint the iris and pupil (or glue a googly eye), poke a small hole and thread twine, or wrap pairs with a pipe cleaner.
4. Painted black flowers in your everyday arrangements
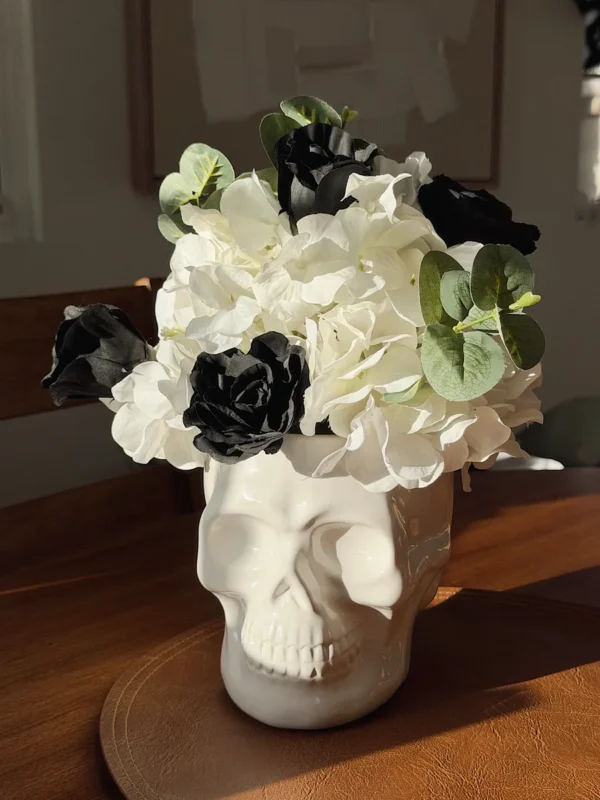
The fastest way to make an existing arrangement feel like Halloween. I keep faux hydrangeas and roses in pots all year. I pulled a few of the roses, painted them with black acrylic mixed with a little glue so they dry slightly glossy, and put them back. The white skull vase on the dining table is the same hydrangeas it always is, with three black roses tucked in.
You need: black acrylic paint, white school glue, a brush you don’t care about; faux flowers you already own. Mine are these hydrangeas in a HomeGoods skull vase, and this one is similar.
Steps: mix roughly two parts paint to one part glue, paint the petals front and back, dry on paper for a few hours, tuck back into the arrangement.
Adding a little glue keeps the paint from flaking. Whether they hold up until next year is TBD.
5. Spider and ribbon candlesticks
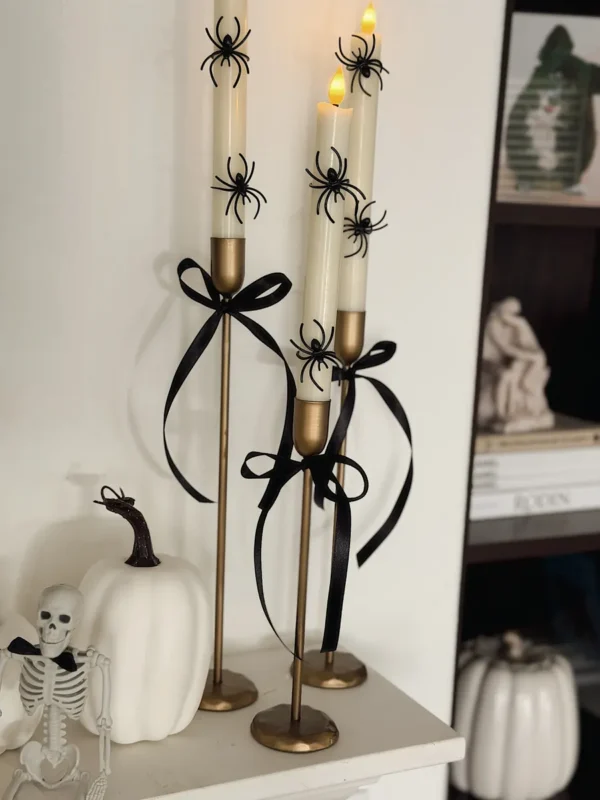
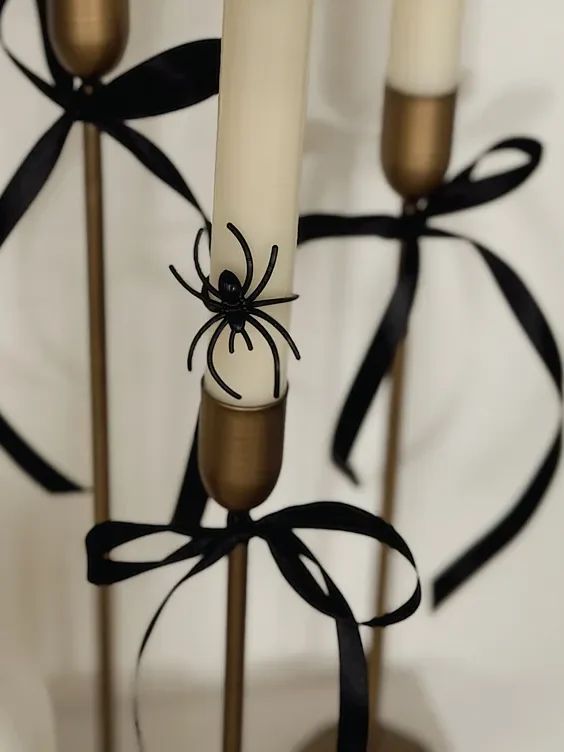
I use these gold candlesticks with flameless tapers at Christmas too. For Halloween, a black ribbon tied in a bow around each stem and a few of the inexpensive plastic spider rings from Target hooked onto the candles. Took five minutes and reads as the most designer thing on the shelf.
You need: black satin ribbon (Amazon), plastic spider rings, flameless taper candles (Amazon), brass candlestick holders (Amazon)
Steps: tie a bow around each candlestick, snip the ring band off each spider if needed, press onto the candle.
6. Book page pumpkins
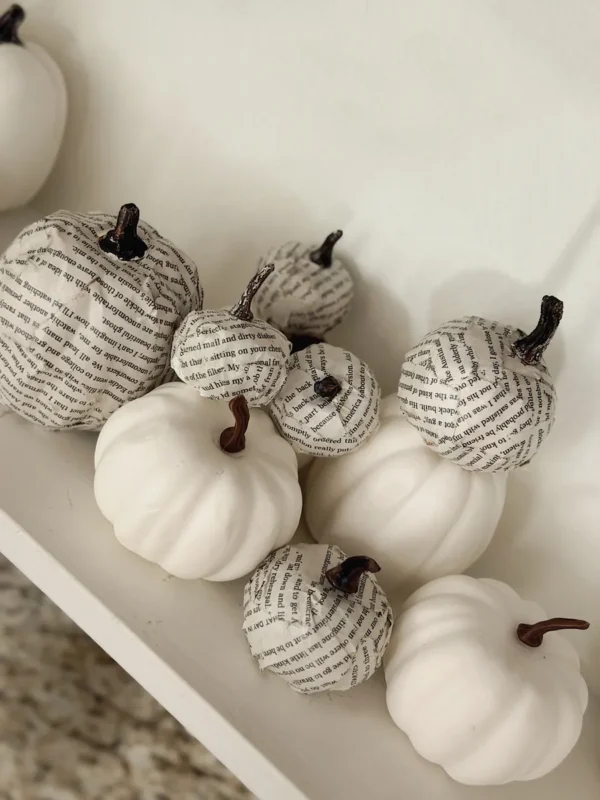
Last year’s white craft pumpkins got a makeover. I tore pages from an old paperback I was getting rid of anyway, brushed on Mod Podge, and layered the pages over the pumpkins. Glue and water works too. They sit on the mantel mixed in with the plain white ones so it’s black and white without being too repetitive (not to mention, less work).
You need: craft pumpkins (Amazon), Mod Podge or school glue, foam brush, an old book. The plain white pumpkins on the mantel are from HomeGoods; these are similar.
Steps: tear pages into pieces, brush a thin coat of Mod Podge on the pumpkin, press the paper on, brush another coat over the top, overlap and keep going, let dry overnight.
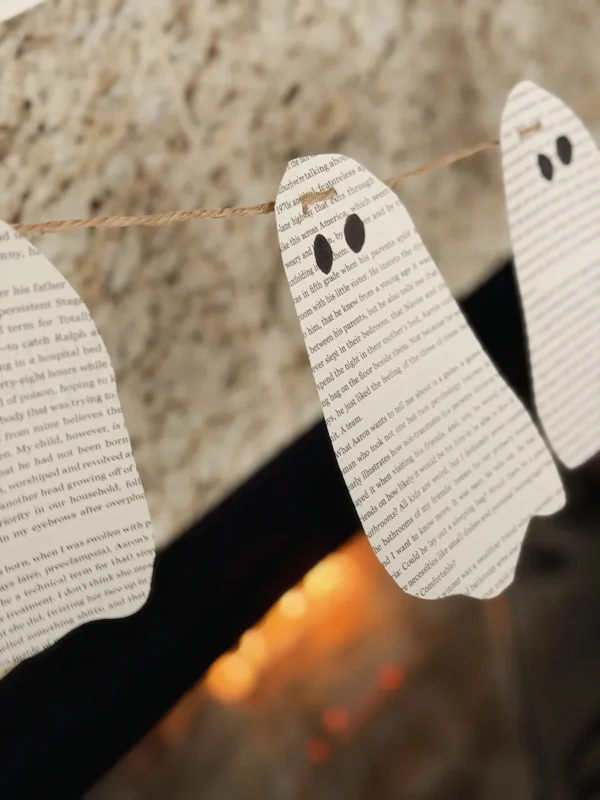
7. Book page ghost garland
Same book. I cut ghost shapes by hand, but you can print a template to trace. Two Sharpie eyes each, then strung on twine across the fireplace and again in the kitchen. I measured the twine first, then added the ghosts in the middle of the strand.
You need: an old book, twine, black Sharpie (Amazon), scissors, a hole punch; a ghost template if you want one
Steps: cut the ghosts, draw eyes, punch a hole at the top of each, and thread them onto the twine.
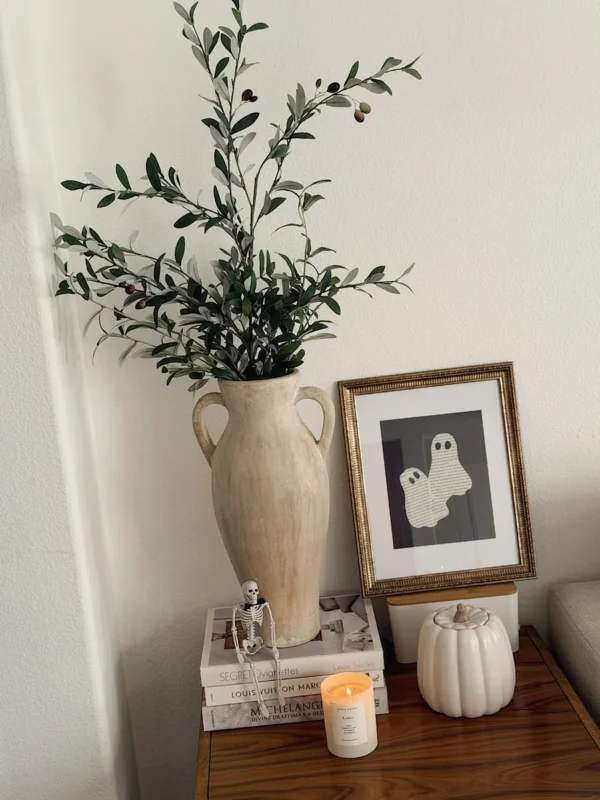
8. Framed book page ghosts
The gold frame on the side table holds other art the rest of the year. For October I cut two ghosts from the book, glued them to black construction paper, and slipped it in. It works for any framed artwork you have around the house.
You need: an old book, black construction paper (Amazon), glue stick, a frame you already own. Mine is from HomeGoods; these (Amazon) are similar.
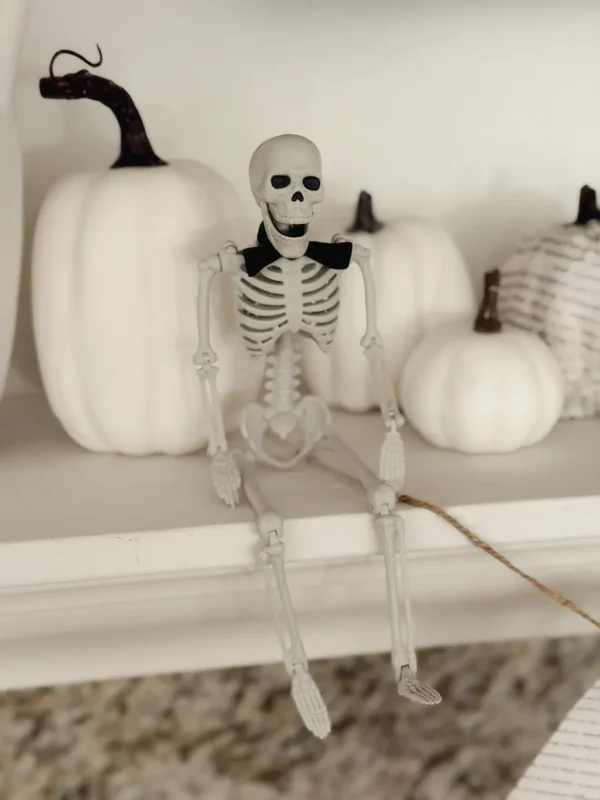
9. Skeleton with a bow tie
I bought a set of four small plastic skeletons from Target. Two sat on the mantel with their legs over the edge, plus a black ribbon tied as a bow tie. Another is propped on the book stack on the side table, the fourth next to the eyeball flowers in the kitchen. The bow tie is the whole trick. Without it it’s a dollar-bin skeleton; with it, it’s a party guest.
You need: mini posable skeletons, black ribbon (Amazon)
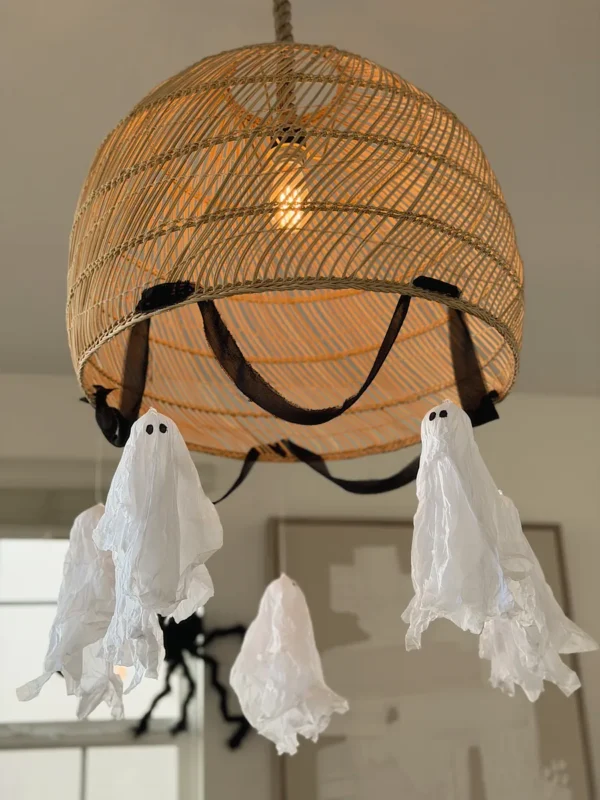
10. Tissue paper ghosts for the chandelier
White tissue paper draped over the small glass ornaments I reuse at Christmas, tied at the neck with black ribbon, two Sharpie eyes, then hung from the rattan chandelier over the table with fishing wire. I threaded black chiffon ribbon through the chandelier too, and used the rest of the roll to make drapey bows on the porch columns out front.
You need: white tissue paper (Amazon), small clear glass ornaments (Amazon), black satin ribbon (Amazon), black chiffon ribbon (Amazon), fishing line (Amazon), black Sharpie. My chandelier is Pottery Barn and sold out; this one is similar.
Steps: center a tissue square over the ornament, add Mod Podge or glue with water, let dry overnight, draw eyes, hang with fishing wire from the ornament loop.
Tip: string the ornaments and tissue paper prior to them getting wet. I like to use one large piece of tissue paper cut in half for two layers of paper per ghost.
I didn’t have a theme in my head when I started, except don’t spend too much money. Now when I look at it, it all feels very Chanel Halloween, and even better, it was really fun to do. My favorite part, though? My son gets so excited every time he walks around the house, giggling at our spooky tree and saying hello to our silly ghosts.
More Halloween Posts to Explore
Mama & Me Costume DIYs
Group Costume DIYs
Easy & Last-Minute Costumes
- J-Lo Green Dress Costume
- Shooting Star Costume
- Catwoman & Poison Ivy
- 3 Last-Minute Costumes
- 6 Last-Minute Costumes
Makeup
More Halloween Decor DIYs
Want to go deeper? Hang out with me over on Substack, where I send out weekly newsletters. Subscribe here.
Pin these easy Halloween DIY decorations for next year.
This post contains affiliate links. If you buy through them, I may earn a small commission at no cost to you.